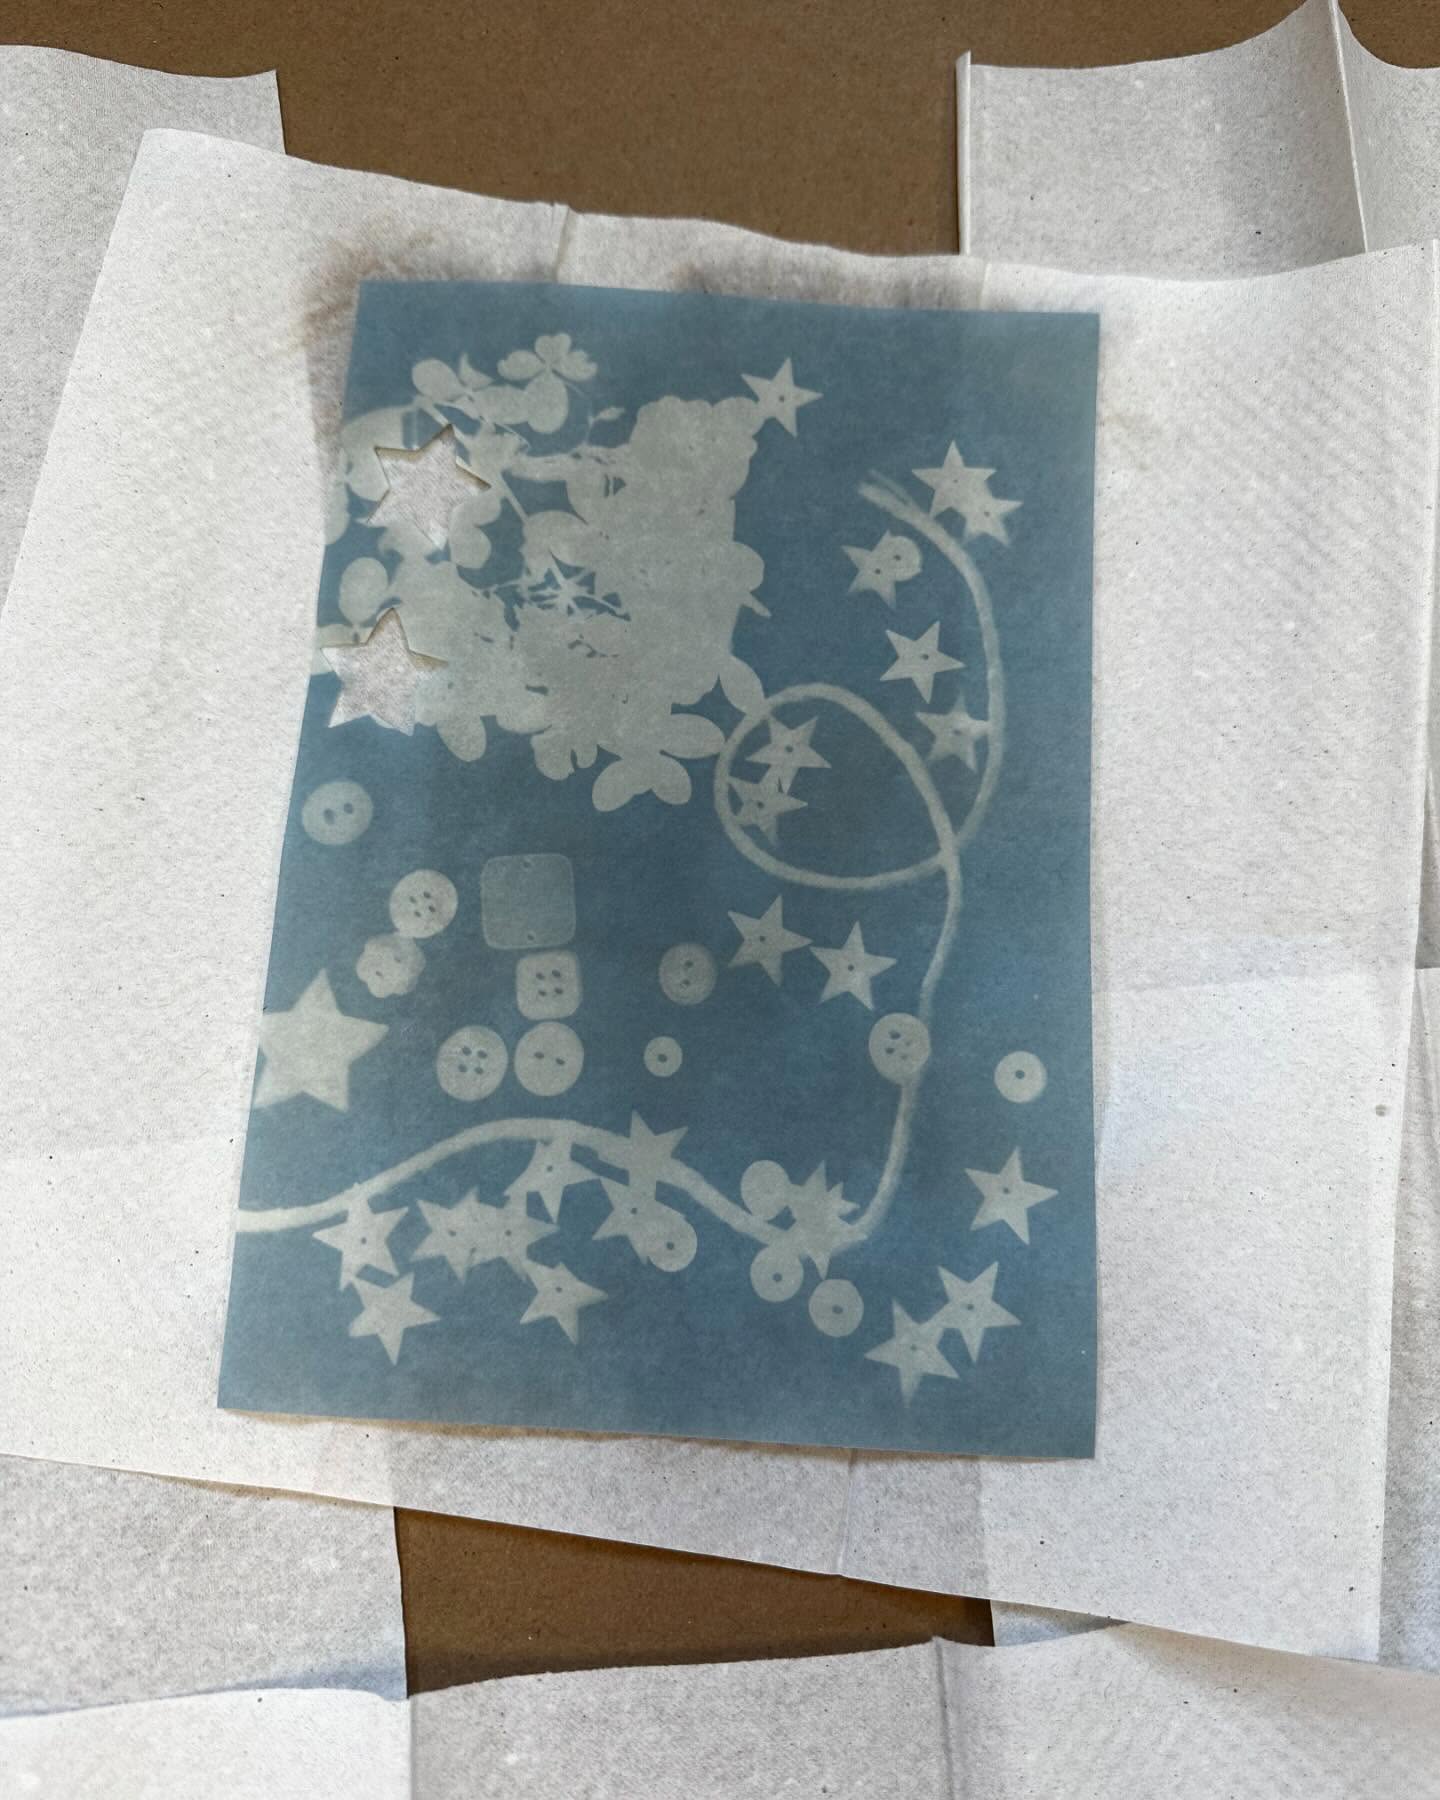
Some art projects feel a little like magic. Cyanotype printing was one of those programs.
The first time participants watched a piece of paper transform from pale green to deep blue, the room filled with excitement. Leaves, flowers, feathers, and found objects suddenly appeared as beautiful white silhouettes against vibrant blue backgrounds.
Part science experiment.
Part photography.
Part art.
And completely fascinating.
This Art Club session introduced children to one of the earliest forms of photography while giving them the opportunity to create stunning artwork using nothing more than sunlight and a little creativity.
What is a Cyanotype?
Cyanotype is one of the oldest photographic printing processes, dating back to 1842.
The process was invented by British scientist and astronomer Sir John Herschel. Later, botanist and photographer Anna Atkins used cyanotypes to document plant specimens, creating what is considered the first published book illustrated with photographs.
Unlike modern photography, cyanotypes don’t require a camera.
Instead, objects are placed directly onto specially treated light-sensitive paper. When exposed to sunlight, the uncovered areas turn a rich Prussian blue while the covered areas remain white.
The result is a beautiful silhouette image that feels both scientific and artistic.
When I introduced the process during Art Club, participants were fascinated by the idea that they were using a technique developed nearly 200 years ago.
Why Cyanotypes Work Well in the Library
One of the things I love most about Art Club is finding projects that combine creativity with learning.
Cyanotypes naturally connect to:
- Art history
- Photography
- Science
- Nature exploration
- Observation skills
They’re also highly accessible.
There is no “right” way to create a cyanotype.
Children who love detailed designs can carefully arrange materials, or those who prefer experimentation can simply place objects on the paper and see what happens.
Both approaches produce beautiful results.


Supplies
Essential Supplies
- Cyanotype paper (pre-treated paper makes this incredibly easy) or,
- Cyanotype chemicals (for a more advanced event, printing on fabric or any other material!)
- A sunny day or UV light source
- Shallow container or tray for rinsing (these trays are amazing and get used for so many projects!)
- Water
- Paper towels
- Clip Boards (helps keep everything sandwiched together while developing)
- Acrylic boards (helps keep everything in place while developing in the sun. Be sure the size matches your paper or item!)
Natural Materials
Some of our favorites included:
- Leaves
- Flowers
- Ferns
- Grass
- Feathers
Other Fun Objects
Encourage participants to experiment with:
- Lace
- Keys
- Stencils
- Toy dinosaurs
- Small plastic animals
- Paper cutouts
- Buttons
- String
The more unusual the object, the more exciting the results can be.
Program Setup
Before participants arrived, I organized a variety of natural materials and found objects for them to explore.
I also encouraged participants to gather their own materials outside before beginning.
This added an extra element of discovery to the program and helped connect the art activity to nature exploration.
Once everyone selected their objects, they grabbed a clipboard and arranged their items on their paper, then sandwiched it between the clipboard and the acrylic sheet.
Originally, we had plannd to take our boards outside, but weather was not cooperating, so we used UV lights instead.
I think I could have accurately predicted the weather based on my summer programming schedule.
How We Made the Prints
The process couldn’t have been simpler.
Step 1: Design Your Print

Participants arranged objects directly on the cyanotype paper.
Some created carefully planned compositions.
Others embraced a more abstract approach.
Both worked beautifully.
Once laid out, carefully cover items with the acrylic, using the board clip to hold it in place.
Step 2: Expose to Sunlight
The papers were placed in direct UV light for several minutes.
Exposure times can vary depending on weather conditions, but generally range from 3–10 minutes.
Step 3: Rinse
After exposure, the items are removed, and the papers are rinsed in water, using the trays.
This is where the magic really happens.
As the chemicals wash away, the brilliant blue color begins to emerge.
Every time we reached this stage, kids were amazed.

Step 4: Dry and Display

Once dry, the prints were ready to take home or display in the library.
The finished pieces looked professional, unique, and surprisingly sophisticated.
Extension Ideas
Want to expand the program?
Try:
Nature Journals
Have participants identify and label the plants used in their prints.
Photography Connections
Discuss the history of photography and how photographic processes have evolved.
Art History Exploration
Introduce participants to Anna Atkins and her groundbreaking botanical cyanotype books.
Collaborative Cyanotype Mural
Combine individual prints into a larger community art display.
Seasonal Themes
- Spring flowers
- Summer leaves
- Fall foliage
- Winter silhouettes
Tips for Success
Check the Weather
Sunlight is your friend. Bright sunny days produce the best results, but have a backup plan!
Prepare Extra Materials
Participants often want to create multiple prints, so having extra paper available is helpful.
Encourage Experimentation
Not every print will turn out perfectly.
That’s okay.
Unexpected results often become favorites.
Use a Drying Area
Designate a space where prints can dry safely without being disturbed. I just laid them out on cookie drying racks, but a table lined with paper towels works okay too.
Why I Loved This Program
Cyanotype printing checks all the boxes for a great library program.
It’s educational.
It’s creative.
It’s hands-on.
It’s memorable.
Participants learn about photography, science, and art history while creating something beautiful they are genuinely proud to take home.
Most importantly, it sparks curiosity. Kids naturally begin asking questions:
How does sunlight make the image appear?
Why does the paper turn blue?
Who invented this?
Those questions lead to learning—and that’s exactly what we hope for in library programming.
Resources
Learn More About Cyanotypes
- The Getty Museum – Cyanotype Photography Process
- Smithsonian Magazine – How the First Female Photographer Changed the Way the World Sees Algae
- Cincinnati Museum – Early Photography; Cyanotypes
Books to Pair with the Program
- Nature identification guides
- Books about Anna Atkins
- Art history resources featuring alternative photographic processes
Final Thoughts
Art Club programs don’t always need paint, clay, or markers to be successful.
Sometimes all you need is sunlight, a few leaves, and a little curiosity.
Cyanotype printing was one of those rare activities that felt equal parts art project, science experiment, and historical exploration.
And watching children discover that a simple leaf could become a beautiful work of art is amazing!
If you enjoyed this post and want to see others like it, check out these popular posts & subscribe to get the newest posts delivered to your inbox!
*This blog is intentionally ad-free. I want it to be a clean, distraction-free space. Here, public librarians can find practical ideas for youth services, outreach, and programming. There will be no pop-ups or sponsored clutter.
Some posts may include affiliate links for books or supplies I genuinely use and recommend. If you choose to purchase through those links, I may earn a small commission at no additional cost to you. It’s a simple way to support the work while getting materials for your own programs.
If you’ve found value in these ideas, please consider helping keep the blog running. I’m unemployed, so tips are always appreciated. They go directly toward hosting costs and content creation. You can do so here: https://www.paypal.com/ncp/payment/SPBXH4RPDHCCY

Leave a Reply